In previous article, we have created DLL with strong name key. But, to install or uninstall it, we still use Developer Command Prompt from Visual Studio. In this article, we will create installer ( .msi ) using Windows Installer XML Toolset (WiX, pronounced “wicks“). So, we can easily install or uninstall the DLL just by double click the installer from Windows Explorer.
Prerequisites:
Ok. Now, let’s play our finger in Visual Studio environment.
- Open Visual Studio and select File – New – Project to create new project.
- In New Project form, select Windows Installer XML – Setup Project. In Name: MyProductSetup and the project is located in C:\Projects\.
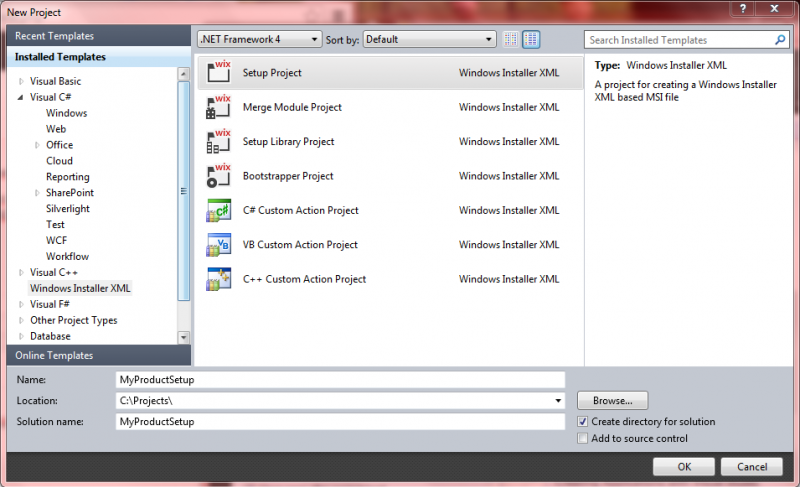
- Click Ok. MyProductSetup solution will be created and Product.wxs appears in VS.
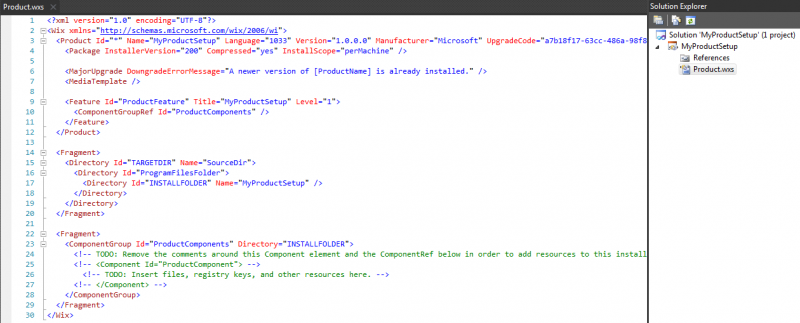
- In line 3, change the Name to your desired name.
<Product Id="*" Name="My Product Utilities" Language="1033" Version="1.0.0.0" />
- Move to line 23 in ComponentGroup.
- Delete the comments there and change it with codes below:
    <ComponentGroup Id="ProductComponents" Directory="INSTALLFOLDER">
      <Component>
        <File Source="$(var.SolutionDir)..\MyProduct\Utilities\bin\$(var.Configuration)\Utilities.dll"
              Assembly=".net" />
      </Component>
    </ComponentGroup>
The key to install DLL to GAC is in Assembly=”.net”. From the documentation, it says
Specifies if this File is a Win32 Assembly or .NET Assembly that needs to be installed into the Global Assembly Cache (GAC). If the value is ‘.net’ or ‘win32’, this file must also be the key path of the Component.
You can read full documentation from here: C:\Program Files (x86)\WiX Toolset v3.8\doc\WiX.chm
- For the File Source, if you build the Utilities project and specify the Solution Platforms to x86, you might change the File Source to be like this one:
<File Source="$(var.SolutionDir)..\MyProduct\Utilities\bin\$(var.Platforms)\$(var.Configuration)\Utilities.dll" />
Yuph. It depends on where you specify the Output Path in project properties.
- And this is the full code from Product.wxs
<?xml version="1.0" encoding="UTF-8"?> <Wix xmlns="http://schemas.microsoft.com/wix/2006/wi"> <Product Id="*" Name="My Product Utilities" Language="1033" Version="1.0.0.0" Manufacturer="Microsoft" UpgradeCode="a7b18f17-63cc-486a-98f8-04ce4cd016fd"> <Package InstallerVersion="200" Compressed="yes" InstallScope="perMachine" /> <MajorUpgrade DowngradeErrorMessage="A newer version of [ProductName] is already installed." /> <MediaTemplate /> <Feature Id="ProductFeature" Title="MyProductSetup" Level="1"> <ComponentGroupRef Id="ProductComponents" /> </Feature> </Product> <Fragment> <Directory Id="TARGETDIR" Name="SourceDir"> <Directory Id="ProgramFilesFolder"> <Directory Id="INSTALLFOLDER" Name="MyProductSetup" /> </Directory> </Directory> </Fragment> <Fragment> <ComponentGroup Id="ProductComponents" Directory="INSTALLFOLDER"> <Component> <File Source="$(var.SolutionDir)..\MyProduct\Utilities\bin\$(var.Configuration)\Utilities.dll" Assembly=".net" /> </Component> </ComponentGroup> </Fragment> </Wix> - Build the solution ( Ctrl + Shift + B ).
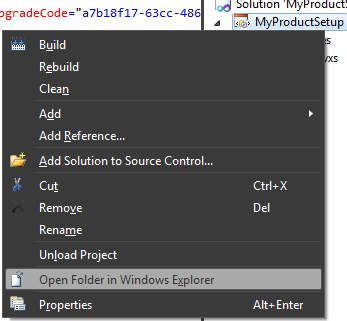
- Right click in MyProductSetup project and select Open Folder in Windows Explorer.
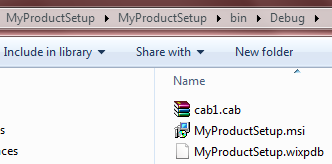
- Open bin directory.
- Open Debug directory.
- MyProductSetup.msi stays here 🙂
Now, we are going to test the installer that we’ve created.
- Double click MyProductSetup.msi
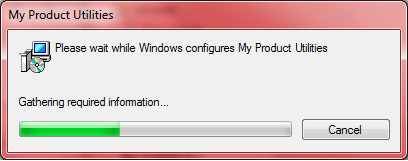
- Wait until the installation process is completed.
- Go to Control Panel\Programs\Programs and Features. You’ll see My Product Utilities in there.

- In Windows Explorer, open C:\Windows\Microsoft.NET\assembly\GAC_MSIL.

So, the installation is succeed. How about the Uninstallation?
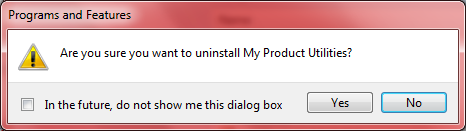
- From Program and Features, uninstall My Product Utilities.
- After the uninstallation process is finished, My Product Utilities will be gone from there.
- And if you open GAC_MSIL directory once again, Utilities directory is gone as well.
Ok. We have finished creating installer using WiX and also tested it. In next article, I’m going to share how to create installer that put file into Program Files directory and also silent installs the Visual Studio extension ( .vsix ) file.
A shawl makes a nice item for a woman to wear out for an evening or to a
formal event. What you need is just extra half
an hour to match up in your head the image you want to project to other people and the theme of the event you are attending.
The silk crepe de chine material moves beautifully while the button-lined back and small train create
a fabulous finish.